
Generating the RRT Image
|
| What is it?
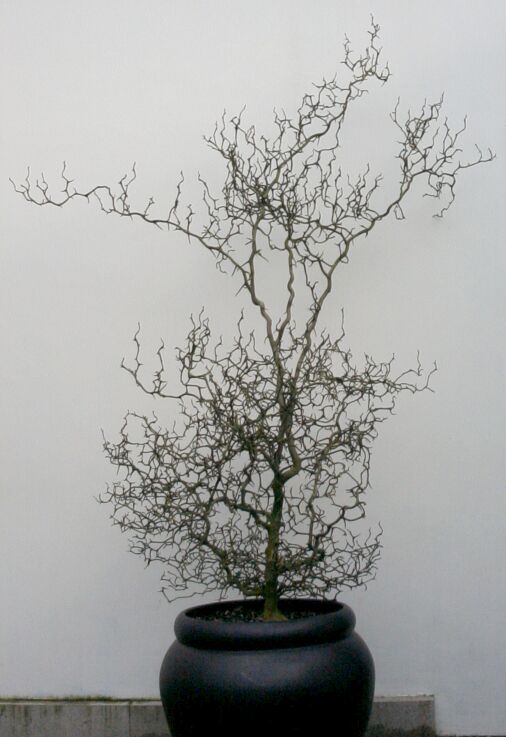
This image illustrates the natural-looking fractal properties of Rapidly-Exploring Random Trees (RRTs). I have recently been using RRTs as a data structure and search algorithm for motion planning applications. The inspiration for creating this came when I noticed a plant that resembled the structure of an RRT at a Chinese garden in Portland, Oregon. |
|
How was it created?
The tree was generated iteratively by sampling a cube in 3 dimensions, and using a seed point located at the base (the "root" of the tree). A total of 1000 nodes were generated by iterating an "Extend" macro. Here is a snippet of the POVRay code I used to generate the whole tree:
////////////////////////////////////////////////////////////////
// "rrt.mcr"
// RRT generation and display macros
// James Kuffner, Jr.
// September 2001

// initialize tree data structures
#declare rrtMaxNodes   = 1000;
#declare rrtNodes      = array[rrtMaxNodes]
#declare rrtNodeParent = array[rrtMaxNodes]
#declare rrtNodeDepth  = array[rrtMaxNodes]

#declare rrtNodeParent[0] = -1;    // parentIndex
#declare rrtNodeDepth[0]  = 0;     // tree depth

////////////////////////////////////////////////////////////////
//
// grow a branch on the RRT
#macro Extend(rrtTarget, rrtStepSize, rrtNumNodes)
  #local nearestIndex = FindNearestNeighbor(rrtTarget, rrtNumNodes);
  #local rrtBase = rrtNodes[nearestIndex];
  #local dist = DistanceMetric(rrtBase, rrtTarget);
  #local fract = 1.0;
  #if (dist > rrtStepSize)
     #local fract = (rrtStepSize / dist);
  #end
  #local rrtEnd = fract * (rrtTarget - rrtBase);
  #declare rrtNodes[rrtNumNodes] = rrtBase + rrtEnd;
  #declare rrtNodeParent[rrtNumNodes] = nearestIndex;
  #declare rrtNodeDepth[rrtNumNodes] = rrtNodeDepth[nearestIndex] + 1;
#end
//////////////////////////////////////////////////////////////// // // incrementally generate rrt #macro BuildRRT(rrtDimension, rrtMin, rrtMax, rootNode, rrtStepSize) #declare rrtNodes[0] = rootNode; // root #declare rrtNodeParent[0] = -1; // parentIndex #declare rrtNodeDepth[0] = 0; // tree depth #local rrtNumNodes = 1; // incrementally build RRT #while (rrtNumNodes < rrtMaxNodes) #local rrtTarget = RandomSample(rrtDimension, rrtMin, rrtMax); Extend(rrtTarget, rrtStepSize, rrtNumNodes) #local rrtNumNodes = rrtNumNodes + 1; #end #end
Rendering the RRT
After the tree was generated, I used another set of macros to generate the tree geometry from the RRT node data. Each branch of the tree is modeled as an open cylinder, with branch connections (RRT nodes) modeled as spheres. The radii of the spheres and cylinders is proportional to the maximum "distance" of all descendant nodes of a given RRT node. This has the effect of making larger all branches that support distant child branches in the tree.
Each of the leaf nodes of the RRT were made to appear "glowing" by adding a hollow, emissive sphere using the POVRay media effect construct:
sphere { < 0, 0, 0 >, 1
  pigment { rgbt < 1, 1, 1, 1 > }   // color of glow
  interior {
    media {
	emission rgb < 1.0, 0.6, 0.7 > * 0.08  // control brightness
	intervals 1
	samples 5
	method 3
	density { spherical }
    }
  }
  translate rrtNodes[i]   // position sphere and leaf node i
  hollow
}
This increases the rendering time a lot, but it adds more depth to the image. In addition to the media effect, I added some simple fog and adjusted the lighting to create a more surrealistic feel.
Some Intermediate Test Images
Here
are a few intermediate images I created along the way to debug and test different
effects:
|
First, I started by generating a simple 2D RRT by sampling a vertical square region. This was primarily to debug and make sure the macros worked. The background is a simple sky sphere and a ground plane with a perturbed normal texture. |
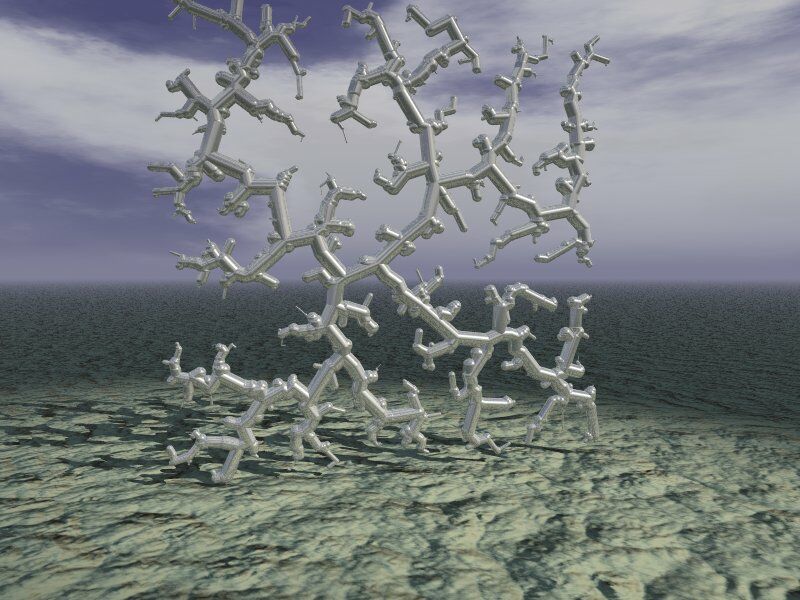
This was the first 3D RRT I generated with 1000
nodes. I added a wood texture which I thought was too dark.
Also, I initially tried to use the node depth in the tree to set the
size of the spheres and cylinders. As you can see, this is not
quite the "simulated growth" effect one would expect. |
|
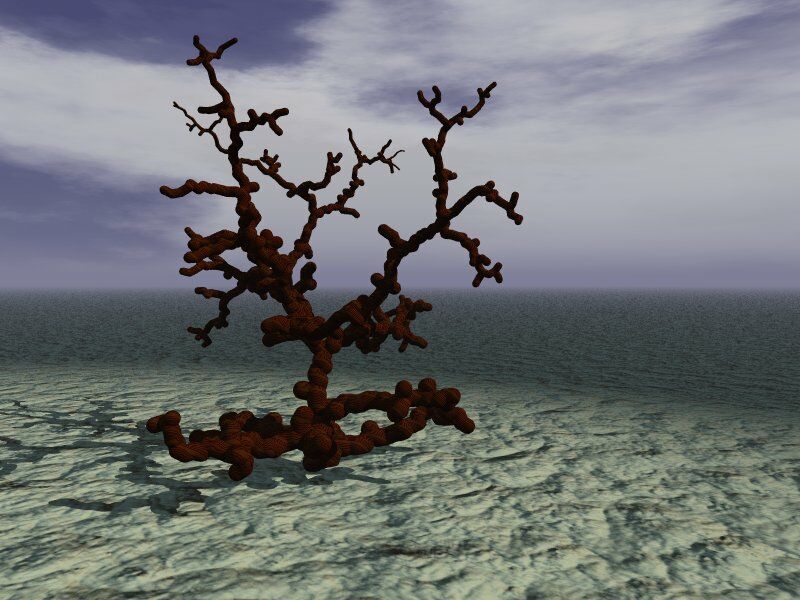
To get a different shape, I generated a new RRT with a simple brown texture and adjusted the camera and lighting a bit. But only in the next step was I able to fix the "bottom-heavy" look. |
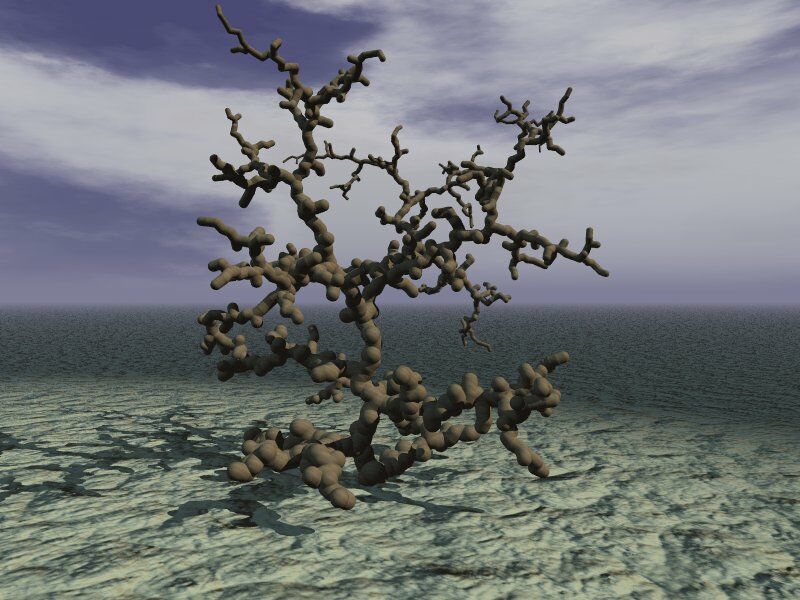
This is the same tree data, but the radii of the spheres and cylinders is proportional to the
maximum "distance" of all descendant nodes of a given RRT node. This has the effect of making
larger all branches that support distant child branches in the tree. |
|
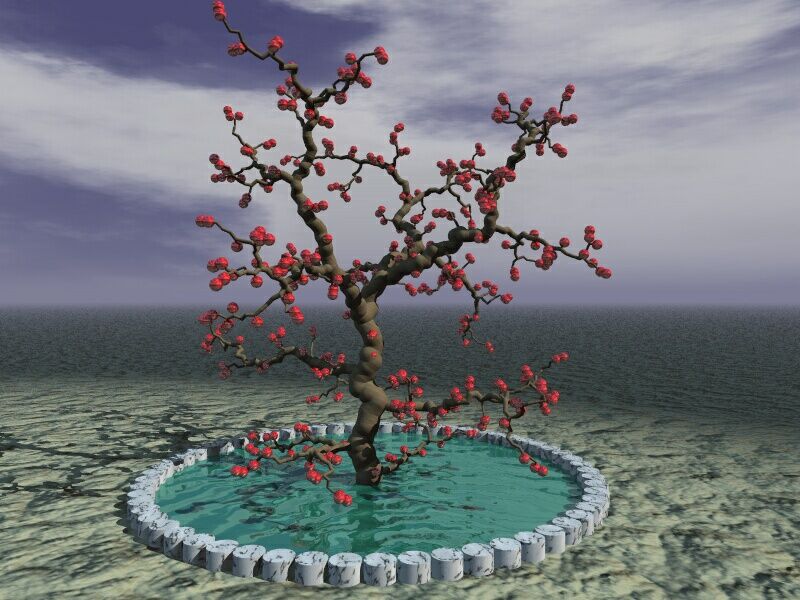
To visualize the leaf nodes, I created this image by rendering red spheres at the locations of all of the leaf nodes in the RRT. I also added a small pool of water with sinusoid normal functions for ripples. |
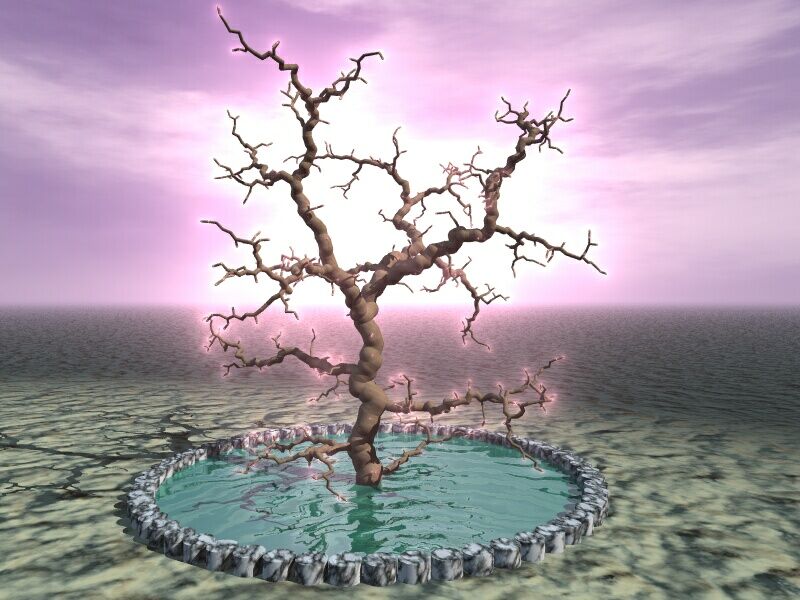
I wanted to change the lighting in the scene, so I
rendered a simple purplish glow effect on all of the leaf nodes using
MegaPOV. I was pretty happy with this image, but wanted to wait
and see how it looked after POVRay 3.5 was released. |
|
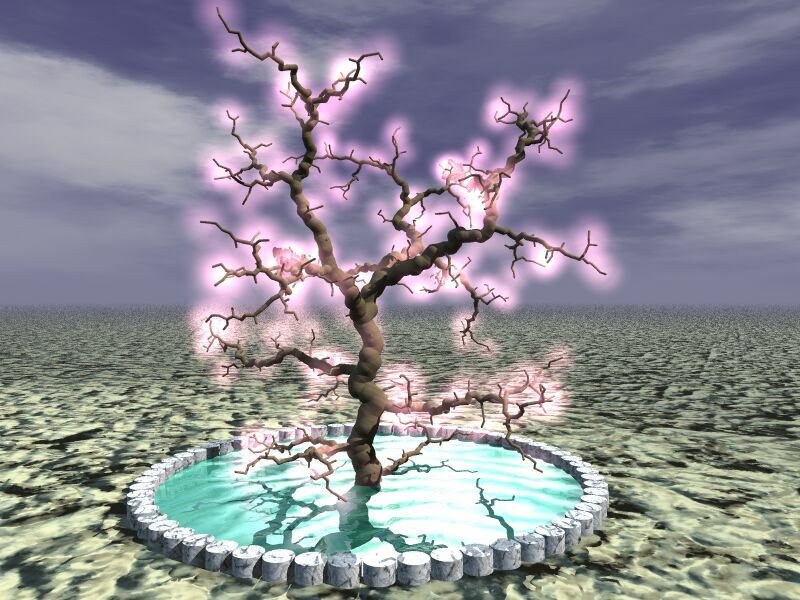
This was my first attempt to render glowing spheres at the the locations of all leaf node in the tree using the media functions of POVRay 3.5 |
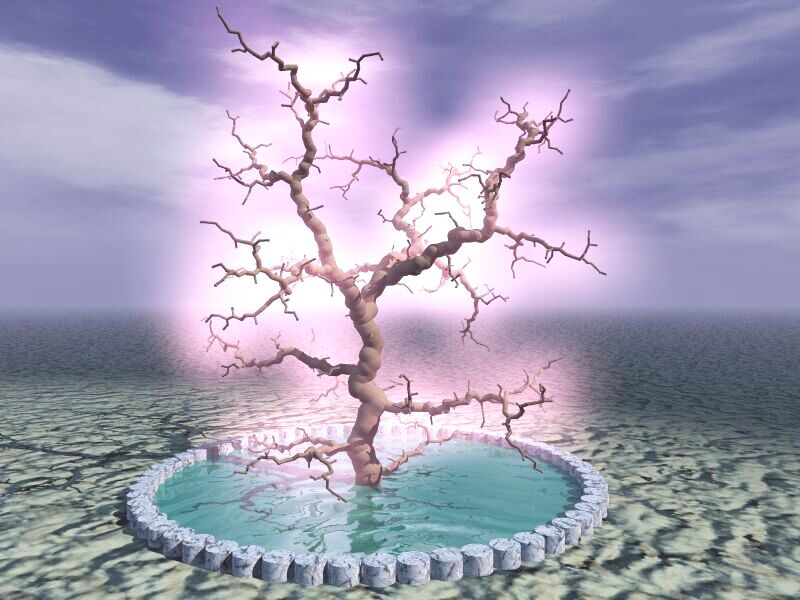
I wanted to make the glow appear to surround all of the branches, so I adjusted the media parameters until I obtained this final image. |
|
-James Kuffner (2002) |